Managing people and devices using the View i-cases screen
This topic describes how to manage people and devices specifically using the View i-cases screen.
This feature requires option E14 Sentinel. If you do not have this option this feature is not available.
NOTE: People and devices can also be managed using the People and devices screen. These screens are coupled therefore any changes you make on one results in the same change on the others. If you prefer to use the People and devices screen then refer to Managing persons.
If you require detailed descriptions of the settings in these procedures refer to View i-cases screen.
To add a person you must have a CASEID (LIID) associated with them.
-
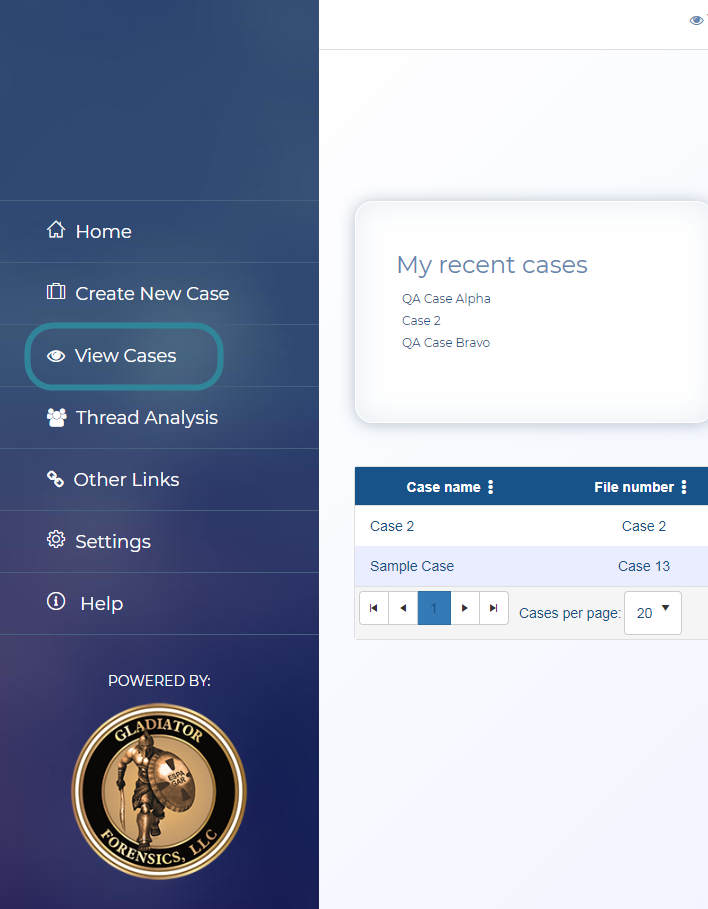
Open the View i-cases screen. It may be that your Home page is configured to open this screen but if not:
-
On the main menu click View Cases.
-
Either the Advanced view cases, View i-cases or the View Cases screen opens depending on your setting of View cases on the User settings screen. If the View Cases or Advanced view cases screens open then click
 at the top-right of the screen to open the View i-cases screen.
-
-
Locate the case you want. To do this either:
- Manually navigate to the case by expanding the folders that the case is located in.
- Enter at least part of the case name then click Search. If the first case it finds is not the one you're wanting to edit then click Next until you reach the your case.
-
Right-click the case and select Create i-case.
The Add i-case dialog box opens.
-
In Intercept monitoring:
-
In Person name enter the person's names. Although this is optional it is strongly recommended that you structure your i-case to a person and their phone number.
-
In Phone number enter the country code and the phone number. Although this is optional it is strongly recommended that you structure your i-case to a person and their phone number.
NOTE: If you do not add a Person name but do enter a Phone number then the phone number is automatically used to populate the Person name.
-
In Operator select the phone number's service provider.
-
If your administrator has created suffixes for the selected operator then you have the option on which method you use to enter the CASEID (LIID). If not you can only use the manual option. Either:
- Manually enter the CASEID (LIID):
In CASEID (LIID) enter the lawful interception identifier. This is the only mandatory setting, all others are optional although it is strongly recommended that you also enter a person name and phone number.
- In i-case name enter a name for the i-case if you prefer to use a name rather than the CASEID (LIID). This is then used, rather than the CASEID (LIID), on the OSS-ESPA screens and the G-Scout App to identify the i-case.
- Automatically enter the CASEID (LIID):
Select Automatically add LIID by prefix/suffix.
- In Prefix and Suffix, if available, select the ones you want appended to the phone number.
- Manually enter the CASEID (LIID):
-
-
In Court authorization info:
-
Select Locations if your warrant has authorized cell site locations.
-
Select Post cut thru digits if your warrant has authorized them.
-
If your intercept monitoring is for wiretaps, then in Content select which types of communication content your warrant has authorized. Note, this setting is not applicable for PRTT.
-
In Valid From and Valid To, enter the dates that the CASEID (LIID) is approved for. The monitoring will end when the valid to date expires. You can use the date pickers to select the dates. However, if you want the Valid From date as today's date then click Now and if the monitoring is valid for a specified number of days then select the number of days then click +.
NOTE: When entering the Valid From and Valid To date you must take into consideration the timezone of date/time on the warrant versus the timezone of your OSS-ESPA system. The timezone of your system is displayed above these settings. For example, if the timezone displays "Eastern Standard Time (-5.00)", and the warrant's date/time is in Eastern Standard Time then you must enter the warrant's date/time in Valid From and Valid To. However, if your warrant is in Pacific Standard Time then you must increase the time entered in the Valid From and Valid To settings by 3 hours.
-
In Court authorization ID enter the search warrant identifier. This is then included in Evidence Management and Reporting.
-
If your intercept monitoring is for wiretaps, then in Evidence storage and Evidence storage backup, select the paths you want used for archiving the case's Sentinel data. Note, this setting is not applicable for PRTT.
-
-
Click Apply. The dialog boxes closes and the person with their i-case is added to the case.
-
Open the View i-cases screen. It may be that your Home page is configured to open this screen but if not:
-
On the main menu click View Cases.
-
Either the Advanced view cases, View i-cases or the View Cases screen opens depending on your setting of View cases on the User settings screen. If the View Cases or Advanced view cases screens open then click
at the top-right of the screen to open the View i-cases screen.
-
-
Locate the person you want. To do this either:
- Manually navigate to the case and person by expanding the folders that the person is located in.
- Enter at least part of the person name then click Search. If the first person it finds is not the one you're wanting to edit then click Next until you reach the correct person.
-
Right-click the person and select Properties.
The Person property dialog box opens.
-
Edit the settings as required then click Apply.
The dialog box closes and the person's details are updated with your changes.
-
Open the View i-cases screen. It may be that your Home page is configured to open this screen but if not:
-
On the main menu click View Cases.
-
Either the Advanced view cases, View i-cases or the View Cases screen opens depending on your setting of View cases on the User settings screen. If the View Cases or Advanced view cases screens open then click
at the top-right of the screen to open the View i-cases screen.
-
-
Locate the person you want. To do this either:
- Manually navigate to the case and person by expanding the folders that the person is located in.
- Enter at least part of the person name then click Search. If the first person it finds is not the one you're wanting to edit then click Next until you reach the correct person.
-
Right-click the person and select Delete.
Click OK on the confirmation dialog. The person is deleted and no longer displayed on the screen.
To add a phone number to a case you must have an CASEID (LIID) associated with the phone. You must use the same procedure as detailed in To create a person and you must also include the phone number.
To add a phone number to an existing person you must have a lawful interception identifier associated with the phone.
-
Open the View i-cases screen. It may be that your Home page is configured to open this screen but if not:
-
On the main menu click View Cases.
-
Either the Advanced view cases, View i-cases or the View Cases screen opens depending on your setting of View cases on the User settings screen. If the View Cases or Advanced view cases screens open then click
at the top-right of the screen to open the View i-cases screen.
-
-
Locate the person you want. To do this either:
- Manually navigate to the case and person by expanding the folders that the person is located in.
- Enter at least part of the person name then click Search. If the first person it finds is not the one you're wanting to edit then click Next until you reach the correct person.
-
Right-click the person you want to add a phone and i-case to and select Create i-case.
The Add i-case dialog box opens with the person name completed.
-
In Intercept monitoring:
-
In Phone number enter the country code and the phone number. Although this is optional it is strongly recommended that you structure your i-case to a person and their phone number.
NOTE: If you do not add a Person name but do enter a Phone number then the phone number is automatically used to populate the Person name.
-
In Operator select the phone number's service provider.
-
In CASEID (LIID) enter the lawful interception identifier. This is the only mandatory setting, all others are optional although it is strongly recommended that you also enter a person name and phone number.
- In i-case name enter a name for the i-case if you prefer to use a name rather than the CASEID (LIID). This is then used, rather than the CASEID (LIID), on the OSS-ESPA screens and the G-Scout App to identify the i-case.
-
-
Select which information in the intercept you are authorized to analyze.
-
In Court authorization info:
-
Select Locations if your warrant has authorized cell site locations.
-
Select Post cut thru digits if your warrant has authorized them.
-
If your intercept monitoring is for wiretaps, then in Content select which types of communication content your warrant has authorized. Note, this setting is not applicable for PRTT.
-
In Valid From and Valid To, enter the dates that the CASEID (LIID) is approved for. The monitoring will end when the valid to date expires. You can use the date pickers to select the dates. However, if you want the Valid From date as today's date then click Now and if the monitoring is valid for a specified number of days then select the number of days then click +.
NOTE: When entering the Valid From and Valid To date you must take into consideration the timezone of date/time on the warrant versus the timezone of your OSS-ESPA system. The timezone of your system is displayed above these settings. For example, if the timezone displays "Eastern Standard Time (-5.00)", and the warrant's date/time is in Eastern Standard Time then you must enter the warrant's date/time in Valid From and Valid To. However, if your warrant is in Pacific Standard Time then you must increase the time entered in the Valid From and Valid To settings by 3 hours.
-
In Court authorization ID enter the search warrant identifier. This is then included in Evidence Management and Reporting.
-
If your intercept monitoring is for wiretaps, then in Evidence storage and Evidence storage backup, select the paths you want used for archiving the case's Sentinel data. Note, this setting is not applicable for PRTT.
-
-
Click Apply.
The dialog box closes and the person's details are updated with the new phone and i-case.
-
Open the View i-cases screen. It may be that your Home page is configured to open this screen but if not:
-
On the main menu click View Cases.
-
Either the Advanced view cases, View i-cases or the View Cases screen opens depending on your setting of View cases on the User settings screen. If the View Cases or Advanced view cases screens open then click
at the top-right of the screen to open the View i-cases screen.
-
-
Locate the person you want. To do this either:
- Manually navigate to the case and person by expanding the folders that the person is located in.
- Enter at least part of the person name then click Search. If the first person it finds is not the one you're wanting to edit then click Next until you reach the correct person.
-
Right-click the phone and select Properties.
The Phone number property dialog box opens.
-
Edit the settings as required then click Apply.
The dialog box closes and the phone's details are updated with your changes.
-
Open the View i-cases screen. It may be that your Home page is configured to open this screen but if not:
-
On the main menu click View Cases.
-
Either the Advanced view cases, View i-cases or the View Cases screen opens depending on your setting of View cases on the User settings screen. If the View Cases or Advanced view cases screens open then click
at the top-right of the screen to open the View i-cases screen.
-
-
Locate the phone you want. To do this either:
- Manually navigate to the case, person then phone number by expanding the folders that the phone is located in.
- Enter the phone number then click Search. If the first occurrence of the phone number it finds is not the one you're wanting to edit then click Next until you reach the correct phone.
-
Right-click the phone and select Delete.
Click OK on the confirmation dialog. Your phone is deleted and no longer displayed on the screen.